Sentry
Setup Sentry
Gather Relevant Information
You need the following information:
organization slugis available in your Organization settings tabproject nameis available in your project's Settings > Projects tab (find it in the list)DSNis available in your project's Settings > Projects > Project name > Under SDK Setup section > Client Keys (DSN) tab.
Configure App
Update the DSN in the app
Go to apps/native/app/_layout.tsx and update the dsn to your DSN.
Sentry.init({
    dsn: "https://....ingest.us.sentry.io/...",
Update the Sentry plugin in app.config.ts
Go to apps/native/app.config.ts and update the Sentry plugin with your org and project:
[
"@sentry/react-native/expo",
{
url: "https://sentry.io/",
project: "<your-project-here>",
organization: "<your-org-here>",
note: "Use SENTRY_AUTH_TOKEN env to authenticate with Sentry.",
},
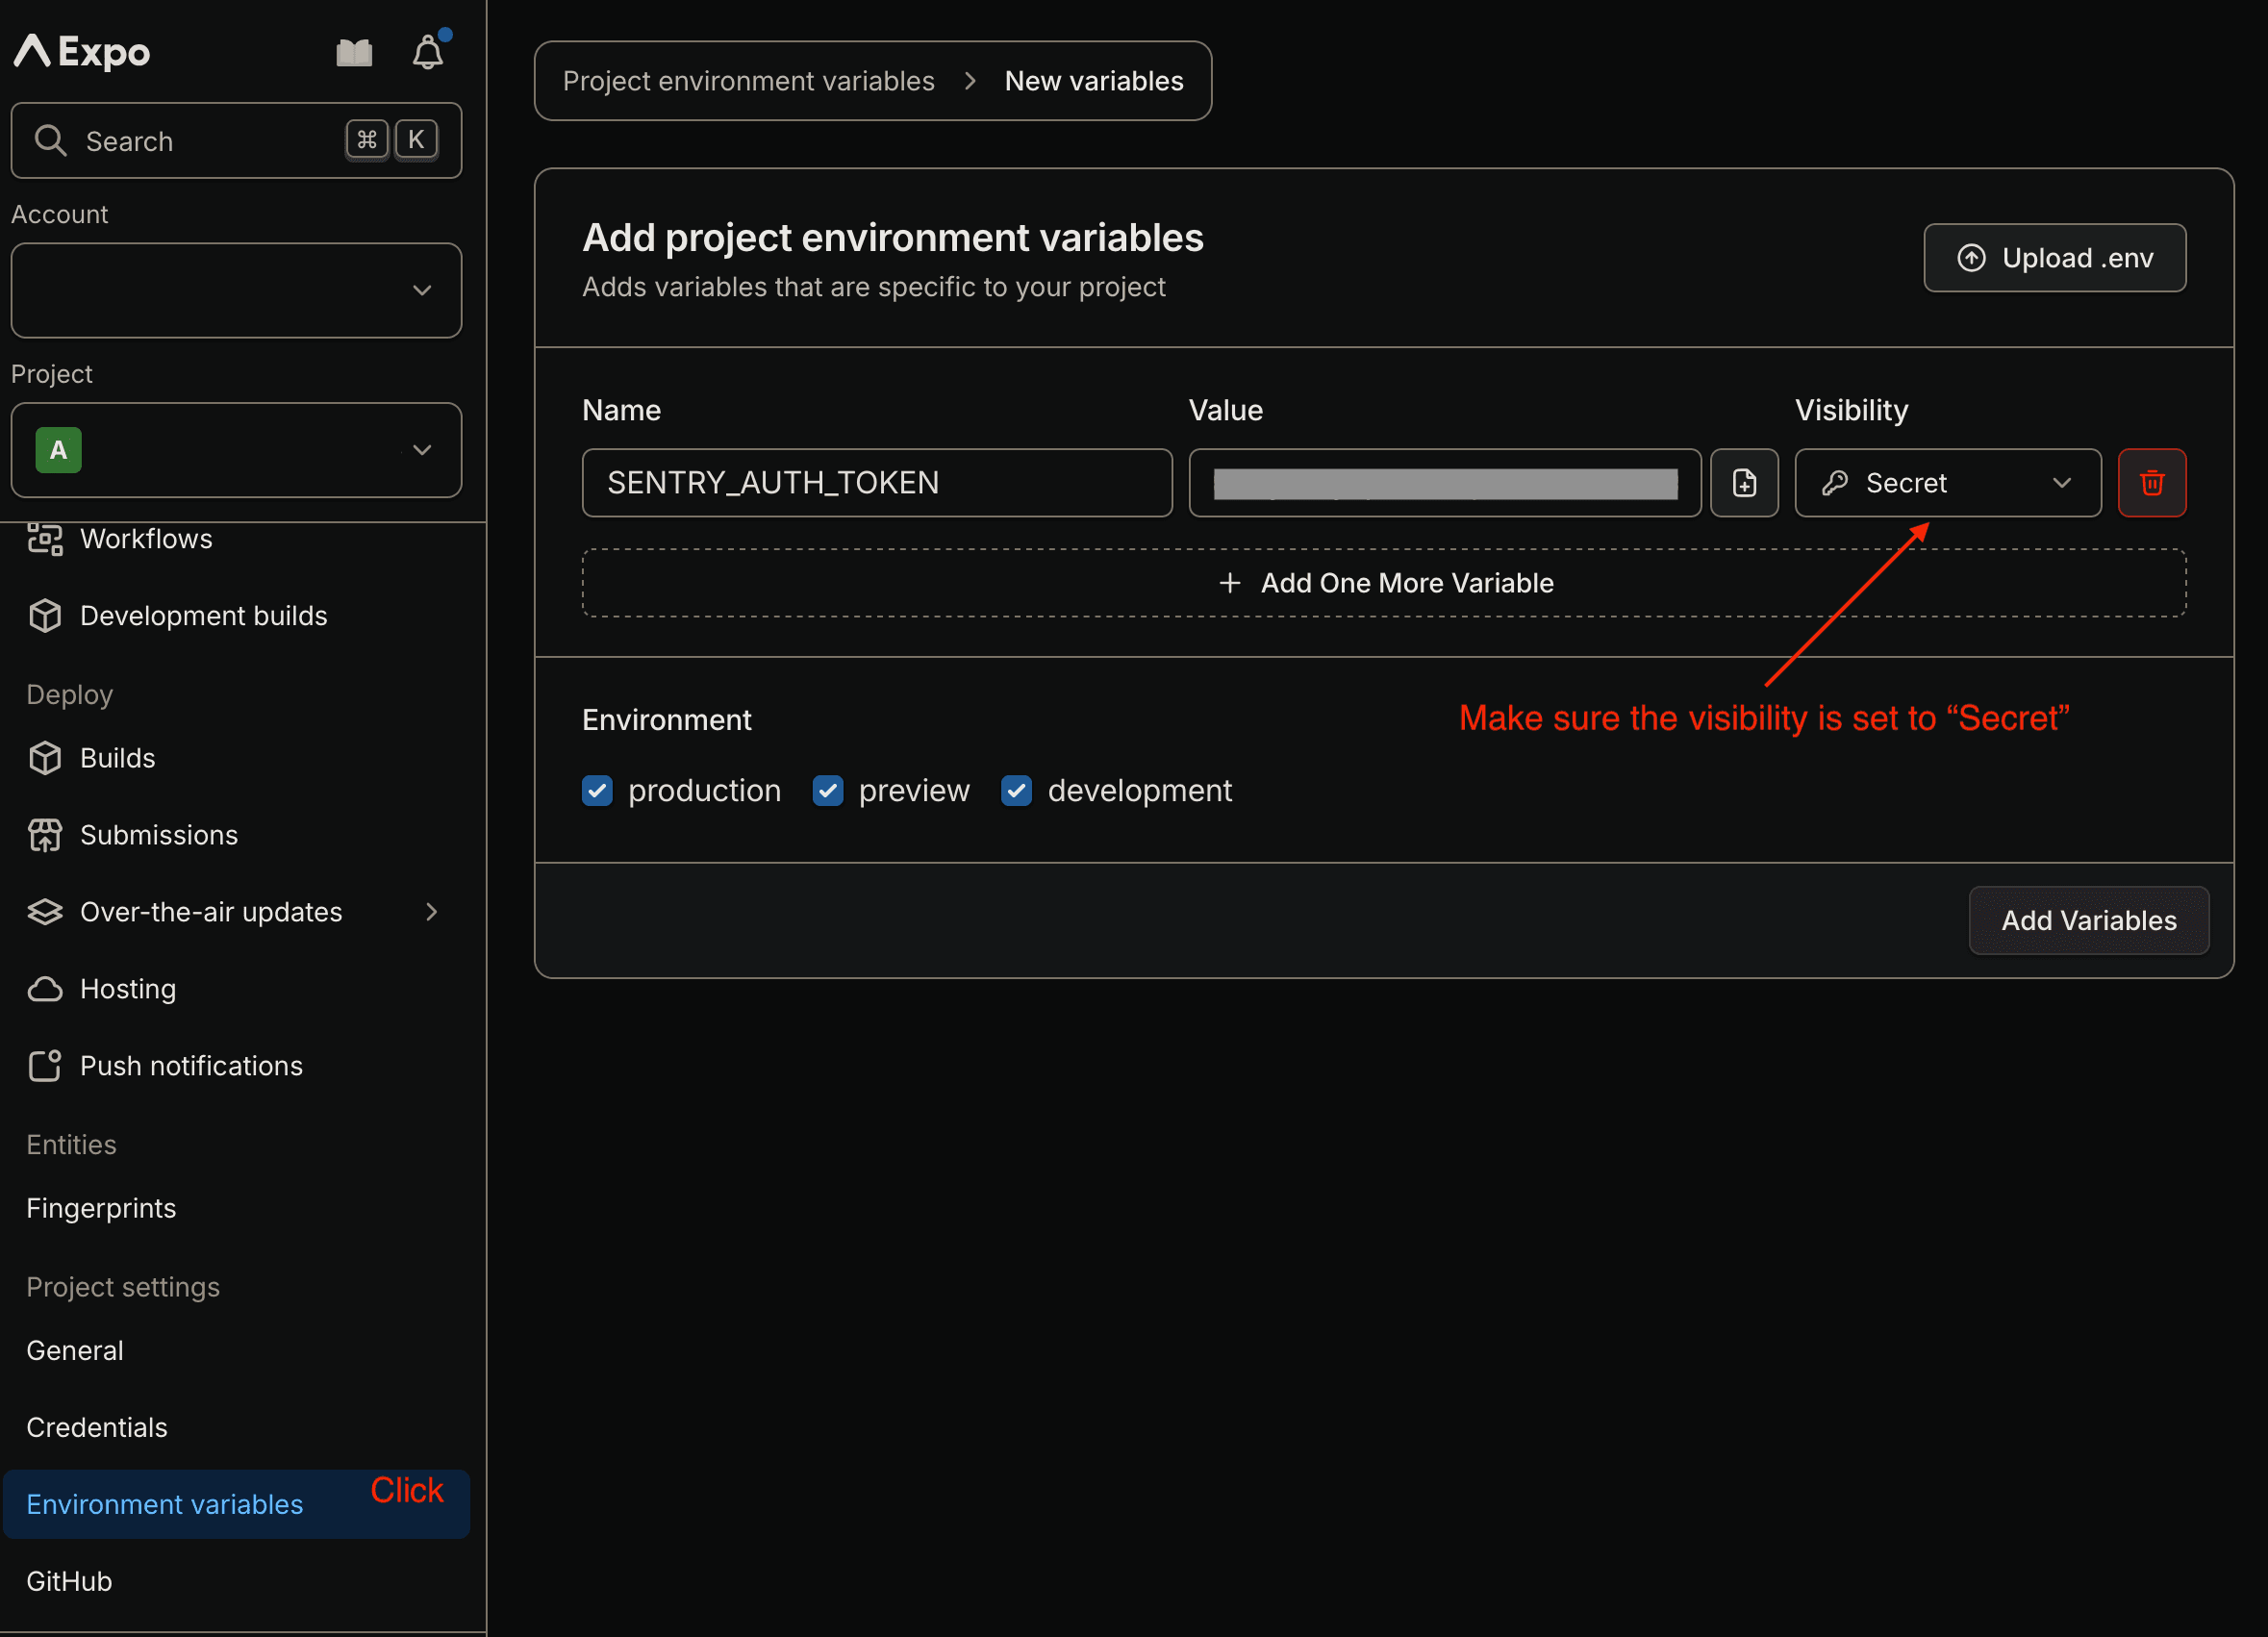
],Setup the SENTRY_AUTH_TOKEN
This is required when creating a production build via EAS. The build will fail without this.
This will allow EAS to upload your sourcemaps for debugging towards the end of the build process. This will allow Sentry to show you exactly where the errors are coming from in the code in production.
Go to the Developer Settings > Auth Tokens page in Sentry and create a new Organization Auth Token. The token is automatically scoped for Source Map Upload and Release Creation. Keep note of it.
Save the Auth Token to your environment variables:
- If you're using
.env.production, add it to the file. - If you're using EAS, add it to your project's environment variables.